Overview
SwiftUI makes it easy to add keyboard shortcuts to your macOS apps.
Keyboard shortcuts can help users quickly access app features and improve productivity. In this article, we’ll walk through how to use keyboard shortcuts in SwiftUI using a simple example app.
We’ll begin by creating a simple encoding/decoding app in SwiftUI. We’ll then add keyboard shortcuts to the app using the keyboardShortcut()1 modifier. Finally, we’ll show how to use global keyboard shortcuts using the HotKey2 extension.
Creating the App
Our app will have two text fields and two buttons. One text field will be for entering a string to encode/decode, and the other will display the result. The buttons will be used to perform the encoding/decoding and copying the result to the clipboard.
Here’s the code for our app:
struct ContentView: View {
    @State private var inputText = ""
    @State private var resultText = ""

    var body: some View {
        VStack {
            TextField("Enter text", text: $inputText)
                .padding()
            Button("Encode") {
                resultText = encode(inputText)
            }
            .keyboardShortcut("e", modifiers: [.command])
            Button("Decode") {
                resultText = decode(inputText)
            }
            .keyboardShortcut("d", modifiers: [.command])
            TextField("Result", text: $resultText)
                .padding()
            Button("Copy to Clipboard") {
                copyToClipboard(resultText)
            }
            .keyboardShortcut("c", modifiers: [.command])
        }
        .padding()
    }

    func encode(_ string: String) -> String {
        // Encoding logic here
    }

    func decode(_ string: String) -> String {
        // Decoding logic here
    }

    func copyToClipboard(_ string: String) {
        // Copy to clipboard logic here
    }
}
Adding Keyboard Shortcuts
To add keyboard shortcuts to our app, we’ll use the keyboardShortcut() modifier. This modifier takes a key and an optional set of modifiers. In our app, we’ve added keyboard shortcuts for the encode, decode, and copy to clipboard buttons.
Button("Encode") {
    resultText = encode(inputText)
}
.keyboardShortcut("e", modifiers: [.command])

Button("Decode") {
    resultText = decode(inputText)
}
.keyboardShortcut("d", modifiers: [.command])

Button("Copy to Clipboard") {
    copyToClipboard(resultText)
}
.keyboardShortcut("c", modifiers: [.command])
Now, when the user presses ⌘ + E, ⌘ + D, or ⌘ + C, the corresponding button will be triggered.
Global Keyboard Shortcuts
Sometimes, it’s useful to have keyboard shortcuts that work even when the app isn’t in the foreground. This is where the HotKey extension comes in. We can use this extension to register global keyboard shortcuts that work no matter which app is in the foreground.
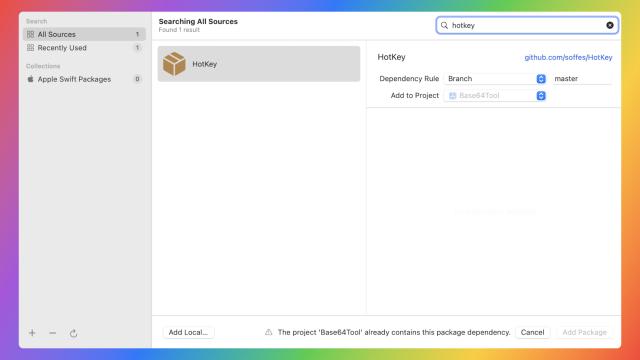
To use the HotKey package in your SwiftUI app, you’ll need to add it to your project. You can do this by adding the package to your project’s dependencies in Xcode.
Xcode -> File -> Add Packages
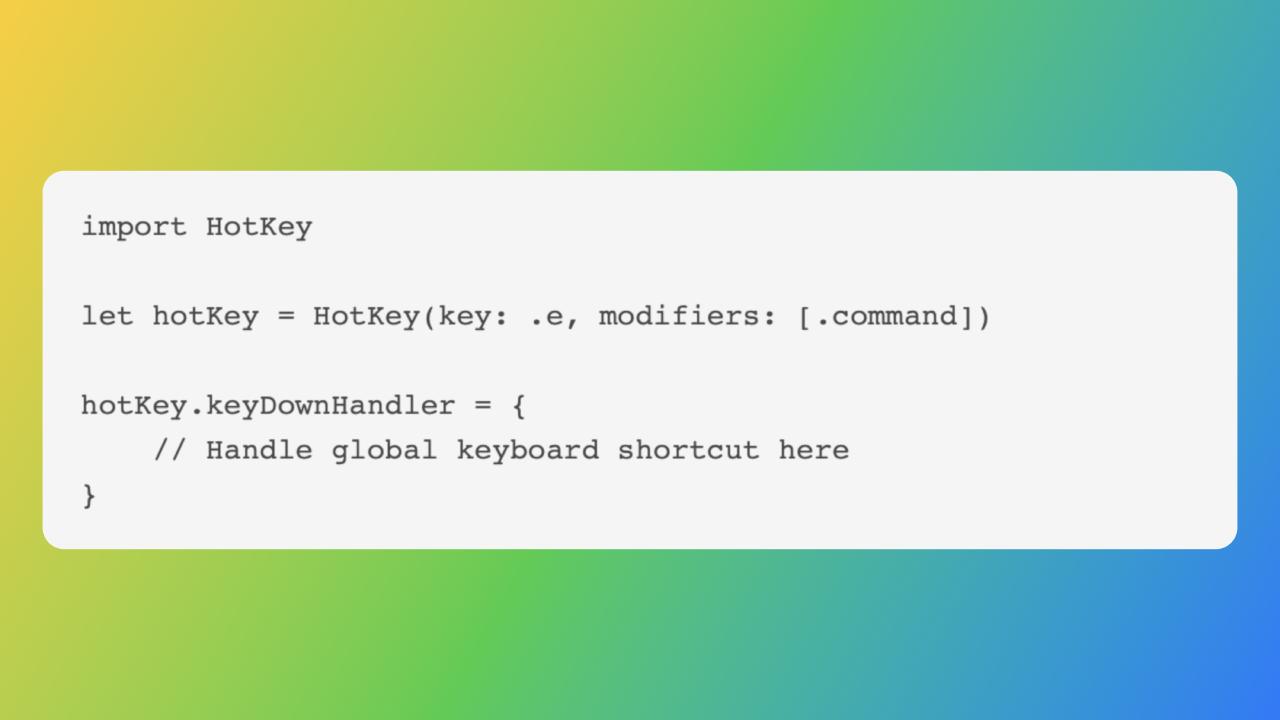
Once you’ve added the package, you can import it into your project and start using it to register global keyboard shortcuts.
import HotKey

let hotKey = HotKey(key: .e, modifiers: [.command])

hotKey.keyDownHandler = {
    // Handle global keyboard shortcut here
}
In this example, we’re registering a global keyboard shortcut for ⌘ + E. When the user presses this keyboard shortcut, the keyDownHandler closure will be executed.
In our app, we could use a global keyboard shortcut to show the app’s main window, even if it’s in the background. We could then use the same keyboard shortcuts to trigger the encoding/decoding and copying to clipboard functionality.
How I used it
Here’s how I used it in my swiftUI code:
import SwiftUI
import HotKey

struct ClipInput: Codable, Hashable {
    var inputText: String
    var encodedText: String
}

@main
struct Base64ToolApp: App {
    @Environment(\.openWindow) var openWindow
    var ehotkey = HotKey(key: .e, modifiers: [.option, .command])
    var dhotkey = HotKey(key: .d, modifiers: [.option, .command])
    @State var clipboardText: String = "nothing"
    var body: some Scene {
        WindowGroup(id: "OMG") {
            ContentView(inputText: "", encodedText: "").frame(width: 800, height: 300)
            .onAppear {
                ehotkey.keyDownHandler =  ebuttonAction
                dhotkey.keyDownHandler = dbuttonAction
            }
        }
        WindowGroup(id: "IMG", for: ClipInput.self) { $value in
            ContentView(inputText: value?.inputText ?? "", encodedText: value?.encodedText ?? "").frame(width: 800, height: 300)
        }
        MenuBarExtra("Base64Tool"){
            VStack {
                ContentView(inputText: "", encodedText: "").frame(width: 800, height: 300)
                Button("Full Quit - ⌘Q") {
                    NSApplication.shared.terminate(nil)
                }.keyboardShortcut("q")
            }
        }.menuBarExtraStyle(.window)
    }
    private func ebuttonAction(){
        DispatchQueue.main.async {
            clipboardText = getTextFromClipboard() ?? "No text in clipboard"
            let eclipinput = ClipInput(inputText: clipboardText, encodedText: encodeToBase64(clipboardText))
            openWindow(id: "IMG", value: eclipinput)
        }
    }
    private func dbuttonAction(){
        DispatchQueue.main.async {
            clipboardText = getTextFromClipboard() ?? "No text in clipboard"
            let dclipinput = ClipInput(inputText: clipboardText, encodedText: decodeFromBase64(clipboardText))
            openWindow(id: "IMG", value: dclipinput)
        }
    }
    func getTextFromClipboard() -> String? {
        let pasteboard = NSPasteboard.general
        let pasteboardItems = pasteboard.pasteboardItems
        if let string =  pasteboardItems!.last!.string(forType: NSPasteboard.PasteboardType(rawValue: "public.utf8-plain-text")) {
            return string
        }
        return nil
    }
}
Conclusion
Adding keyboard shortcuts to your SwiftUI apps is easy and can greatly improve the user experience. By using the keyboardShortcut() modifier and the HotKey extension, you can create keyboard shortcuts that work both in and out of your app’s window.