Introduction
In SwiftUI, the PhotosPicker1 view can be used to select images and videos from the ‘Photos’ application.
Before we dive into the implementation, go through a sample snippet:
Alternative, get code here
I will explain the parts of this snippet and you can use this to get your job done.
What is PhotosPicker?
PhotosPicker is a view which can be imported from PhotosUI package.
This can be used with SwiftUI.
How does PhotosPicker work?
PhotosPicker returns a PhotosPickerItem2, which can be loaded into a SwiftUI Image object.
There are several ways to programmatically pick images using PhotosPicker. In this example, we shall focus on a straightforward implementation.
We shall give this view:
- A label
- A variable to hold the PhotosPickerItem object
- A filter to help us choose the file type using supported
PHPickerFilter
This is how we will place the picker into your app screen using SwiftUI,
PhotosPicker("Random Label", selection: $photos_picker_item, matching: .images)
Let’s try to understand how each of these work,
‘label’ is a random text string for us to identify the photos picker instance.
‘selection’ parameter will hold a binding to another variable
💡 A binding means that we are modifying an existing variable.
We can create a original variable called
photos_picker_itemto hold the values of Images picked.import PhotosUI import SwiftUI // ... @State var photos_picker_item: PhotosPickerItem? @State var image: Image? // ... PhotosPicker("Select Image from Photos App", selection: $photos_picker_item, matching: .images) .onChange(of: photos_picker_item) { photos_picker_item in Task { if let data = try? await photos_picker_item?.loadTransferable(type: Data.self) { if let uiImage = UIImage(data: data) { image = Image(uiImage: uiImage) } } } } //...Whatever image is selected using
PhotosPicker, will available inphotos_picker_item‘matching’ is essentially a filter to control what type of files we want the user to select from the photos app.
This value will be of type
PHPickerFilter3 and can specify images, videos, livePhotos, screenshots, timelapseVideos and many more.
Now that we’ve a way to pick files from the Photos app, we need to focus on actually rendering and using the selected file in our app.
We now have a PhotosPickerItem variable photos_picker_item containing the selected file.
Let’s try to convert this into a SwiftUI Image.
import PhotosUI
import SwiftUI

// ...

@State var photos_picker_item: PhotosPickerItem?
@State var image: Image?

//...

PhotosPicker("Select Image from Photos App", selection: $photos_picker_item, matching: .images)
.onChange(of: photos_picker_item) { photos_picker_item in
    Task {
        if let data = try? await photos_picker_item?.loadTransferable(type: Data.self) {
            if let uiImage = UIImage(data: data) {
                image = Image(uiImage: uiImage)
            }
        }
    }
}

//...
How to use PhotosPicker?
We can use the onChange modifier, which fires an action when photos_picker_item is loaded.
The image can be built using the loadTransferable method. This is an asynchronous method.
💡 We wrap this inside a
Task4 — where it concurrently loads the data into an Image in SwiftUI
Now, let’s finally render the Image in SwiftUI,
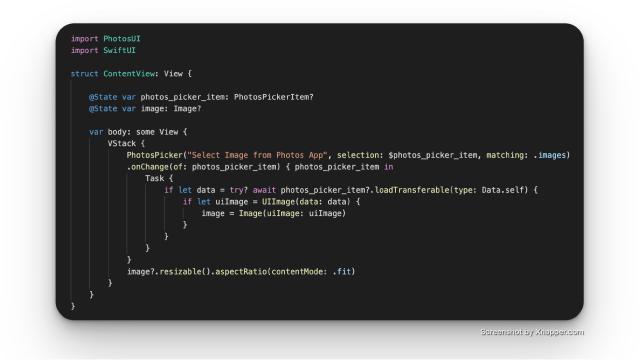
Code Snippet
import PhotosUI
import SwiftUI

struct ContentView: View {

    @State var photos_picker_item: PhotosPickerItem?
    @State var image: Image?

    var body: some View {
        VStack {
            PhotosPicker("Select Image from Photos App", selection: $photos_picker_item, matching: .images)
            .onChange(of: photos_picker_item) { photos_picker_item in
                Task {
                    if let data = try? await photos_picker_item?.loadTransferable(type: Data.self) {
                        if let uiImage = UIImage(data: data) {
                            image = Image(uiImage: uiImage)
                        }
                    }
                }
            }
            image?.resizable().aspectRatio(contentMode: .fit)
        }
    }
}
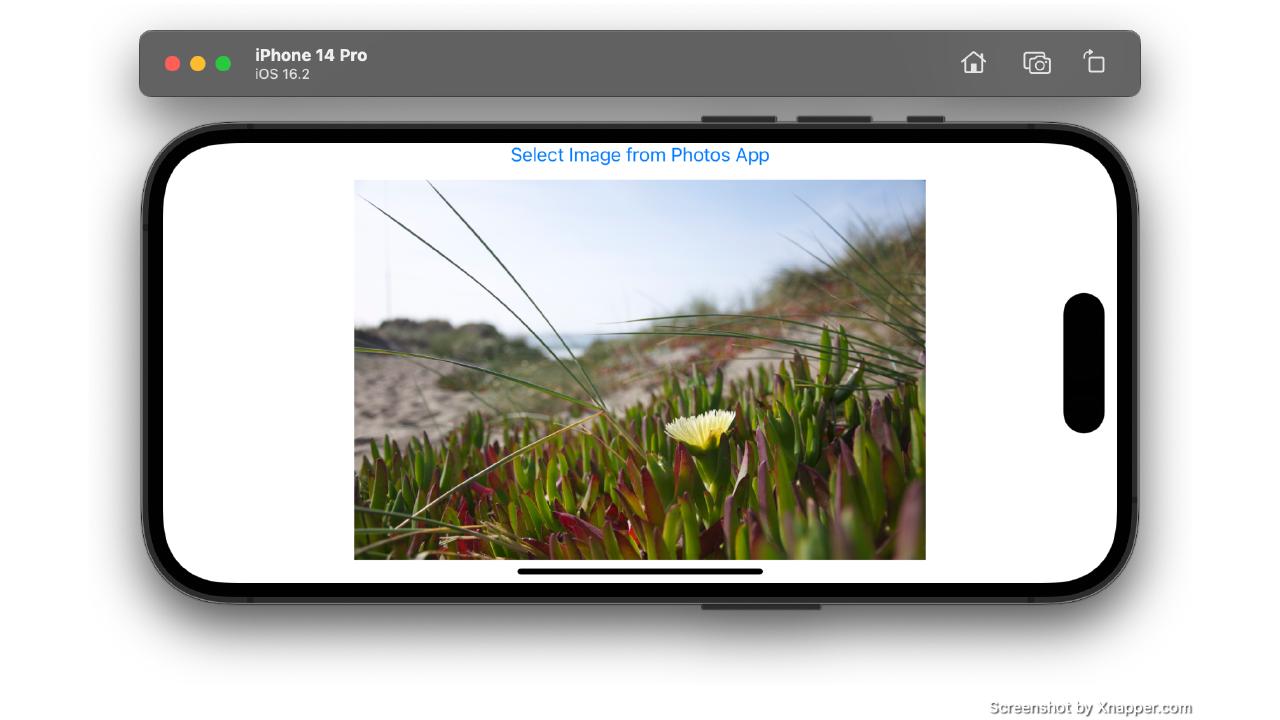
Demonstration
Here’s how it runs on the XCode5 iOS simulator: